
Barn doors, known for their rustic charm, often require careful attention to detail during installation. One crucial aspect involves the use of floor guides for barn doors, which ensures smooth operation and prevents swaying. The National Sliding Door Association offers valuable guidelines and best practices for achieving optimal performance. Installing the correct hardware, including floor guides for barn doors, becomes especially important in high-traffic areas like hallways. Proper alignment and securing of floor guides for barn doors is key to a long-lasting, aesthetically pleasing sliding door.
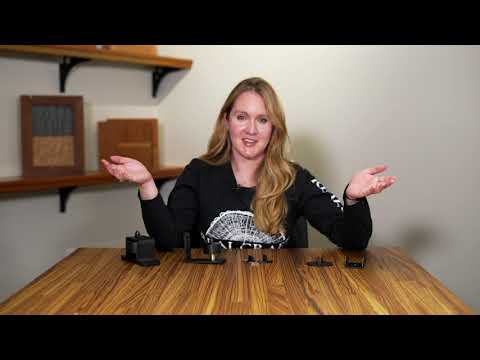
Image taken from the YouTube channel RealCraft , from the video titled Barn Door Floor Guide: What It Is And How To Choose One | RealCraft .
Barn doors have surged in popularity in recent years, gracing homes with their rustic charm and space-saving functionality.
These sliding doors offer a unique alternative to traditional swinging doors, adding a touch of character to any room.
But what often goes unnoticed, yet plays a vital role in their seamless operation and overall aesthetic, is the humble floor guide.
Without a properly installed floor guide, your beautiful barn door is destined for a life of rattling, swinging, and potential damage.
This guide will illuminate the crucial role of floor guides, ensuring your barn door not only looks stunning but also functions flawlessly for years to come.
The Rise of the Barn Door
From farmhouse chic to modern industrial, barn doors have proven their versatility across a range of interior design styles.
Their ability to maximize space, especially in tight areas, makes them a practical and stylish choice for homeowners.
The visual appeal of a barn door, often featuring exposed hardware and natural wood finishes, contributes to its widespread adoption.
These doors can serve as a focal point, adding a touch of warmth and character to any room.
Why Floor Guides are Essential
While the aesthetic appeal of barn doors is undeniable, their functionality hinges on a seemingly small component: the floor guide.
This unassuming piece of hardware is responsible for keeping the barn door stable, preventing it from swinging freely and potentially damaging the wall or itself.
A well-chosen and properly installed floor guide ensures smooth, quiet operation, enhancing the overall user experience.
Beyond functionality, floor guides also contribute to the safety of the barn door, preventing it from becoming a hazard, especially in homes with children or pets.
What You’ll Learn in This Guide
This comprehensive guide is designed to equip you with the knowledge needed to understand, select, and install the perfect floor guide for your barn door.
We will explore the various types of floor guides available, highlighting their pros and cons to help you make an informed decision.
You’ll also find a detailed, step-by-step installation guide, complete with tips and troubleshooting advice, to ensure a smooth and successful installation process.
By the end of this guide, you’ll be well-equipped to maintain your floor guide, ensuring long-lasting performance and enjoyment of your beautiful barn door.
Barn doors have surged in popularity in recent years, gracing homes with their rustic charm and space-saving functionality.
These sliding doors offer a unique alternative to traditional swinging doors, adding a touch of character to any room.
But what often goes unnoticed, yet plays a vital role in their seamless operation and overall aesthetic, is the humble floor guide.
Without a properly installed floor guide, your beautiful barn door is destined for a life of rattling, swinging, and potential damage.
This guide will illuminate the crucial role of floor guides, ensuring your barn door not only looks stunning but also functions flawlessly for years to come.
The Rise of the Barn Door
From farmhouse chic to modern industrial, barn doors have proven their versatility across a range of interior design styles.
Their ability to maximize space, especially in tight areas, makes them a practical and stylish choice for homeowners.
The visual appeal of a barn door, often featuring exposed hardware and natural wood finishes, contributes to its widespread adoption.
These doors can serve as a focal point, adding a touch of warmth and character to any room.
Why Floor Guides are Essential
While the aesthetic appeal of barn doors is undeniable, their functionality hinges on a seemingly small component: the floor guide.
This unassuming piece of hardware is responsible for keeping the barn door stable, preventing it from swinging freely and potentially damaging the wall or itself.
A well-chosen and properly installed floor guide ensures smooth, quiet operation, enhancing the overall experience of using your barn door.
Now, let’s delve deeper into the functionality and benefits that these often-overlooked components provide.
Understanding Floor Guides: Functionality and Benefits
At its core, a barn door floor guide is a seemingly simple piece of hardware.
However, its role in the overall performance and longevity of your barn door is paramount.
It’s the unsung hero that ensures smooth, quiet, and safe operation for years to come.
Defining the Floor Guide
A floor guide is a small, but critical component designed to keep your barn door running smoothly along its track.
It’s typically installed on the floor, directly beneath the barn door, acting as a guide to prevent lateral movement.
Its primary function is to stabilize the door, preventing it from swinging inward or outward.
Without it, the door would be prone to swaying and potentially damaging the wall, door, or even nearby furniture.
The Purpose: Stability and Swing Prevention
The main purpose of a floor guide is quite simple: keep the barn door stable and prevent unwanted swinging.
Because barn doors hang from a top rail, they are naturally prone to swinging if not properly guided at the bottom.
The floor guide fills this need, ensuring that the door stays aligned with the track and moves only in a straight line.
This controlled movement is not just about aesthetics; it’s about preventing damage and ensuring safety.
The Benefits of Using Floor Guides
Investing in a quality floor guide and proper installation yields several significant benefits:
Smooth and Quiet Operation
A well-installed floor guide eliminates the rattling and scraping that can occur when a barn door swings freely.
It enables the door to glide smoothly and quietly along the floor, enhancing the overall user experience.
This smooth operation also reduces wear and tear on the door and hardware, extending their lifespan.
Preventing Damage to the Door and Wall
Uncontrolled swinging can cause the barn door to slam against the wall.
This can result in unsightly dents, scratches, and even structural damage to both the door and the wall.
The floor guide prevents this by keeping the door aligned and preventing any unwanted collisions.
Enhancing Safety
A swinging barn door can be a safety hazard, especially for children and the elderly.
An unguided door can unexpectedly swing into someone’s path, potentially causing injury.
The floor guide mitigates this risk by keeping the door under control, reducing the chances of accidents.
In conclusion, a floor guide is much more than just a small piece of hardware.
It is an essential element in ensuring the functionality, longevity, and safety of your barn door.
By understanding its purpose and benefits, you can appreciate its importance and make informed decisions when selecting and installing one for your barn door.
Exploring Different Types of Barn Door Floor Guides
The humble floor guide is truly the unsung hero that keeps your barn door running smoothly.
But just like barn doors themselves, floor guides aren’t a one-size-fits-all solution.
A variety of styles exist, each with unique characteristics, advantages, and disadvantages.
Choosing the right one depends on your specific door, the surrounding space, and your aesthetic preferences.
Let’s delve into the most common types of barn door floor guides, exploring their features and helping you determine the best fit for your needs.
Wall-Mounted Floor Guides
Description
Wall-mounted floor guides are attached to the wall adjacent to the barn door opening.
They typically feature a channel or roller that the bottom edge of the door slides through.
This type of guide keeps the door aligned and prevents it from swinging away from the wall.
Pros
-
Simple Installation: Generally easier to install compared to other types, requiring only attachment to the wall.
-
Clean Look: Keeps the floor clear and unobstructed, maintaining a minimalist aesthetic.
-
Versatile: Suitable for various door thicknesses and styles.
Cons
-
Requires Adjacent Wall Space: Needs sufficient clear wall space next to the door opening for mounting.
-
Less Forgiving: Can be less tolerant of minor imperfections in the floor or door alignment compared to floor-mounted options.
-
Potential for Rubbing: If not properly aligned, the door can rub against the guide, causing noise and wear.
U-Shaped Floor Guides
Description
U-shaped floor guides are mounted directly onto the floor and feature a U-shaped channel that the bottom of the barn door sits within.
This design fully encases the bottom edge of the door, providing a secure and stable guiding mechanism.
Pros
-
Enhanced Stability: Offers excellent stability, preventing the door from swaying or wobbling.
-
Concealed Hardware: Often provides a more concealed look, with the guide largely hidden beneath the door.
-
Suitable for Thicker Doors: Can accommodate thicker barn doors that may not work with other guide types.
Cons
-
Requires Floor Mounting: Requires drilling into the floor, which may not be suitable for all flooring types.
-
Potential Obstruction: The raised U-shape can be a potential tripping hazard if not properly placed.
-
More Visible: Depending on the design, may be more visible than wall-mounted options.
Adjustable Floor Guides
Description
Adjustable floor guides offer flexibility in accommodating different door thicknesses and slight misalignments.
These guides typically feature adjustable rollers or brackets that can be fine-tuned to ensure a snug and smooth fit.
Pros
-
Highly Adaptable: Can be adjusted to fit a wide range of door thicknesses and floor conditions.
-
Corrects Minor Misalignments: Allows for correcting minor imperfections in door alignment or floor levelness.
-
Reduces Noise: The adjustable rollers minimize friction and noise during door operation.
Cons
-
More Complex Installation: May require more precise installation and adjustments compared to simpler guide types.
-
Higher Cost: Generally more expensive than non-adjustable options.
-
Potential for Loosening: The adjustable components may loosen over time, requiring periodic tightening.
Other Less Common Types of Floor Guides
Beyond the most popular styles, other floor guides cater to specific needs.
These include:
-
Roller Guides: Feature a small wheel that the door rolls against, offering smooth and quiet operation.
-
Pin Guides: Use a small pin that slides within a groove on the bottom of the door.
-
Custom-Designed Guides: Tailored to unique door styles or installation requirements.
Choosing the Right Floor Guide for Your Barn Door
Selecting the appropriate floor guide depends on several factors:
-
Door Style and Thickness: Thicker doors may require U-shaped or adjustable guides, while thinner doors can often work with wall-mounted options.
-
Available Space: Wall-mounted guides require adjacent wall space, while floor-mounted guides need clear floor space.
-
Floor Type: Consider your flooring material when choosing a floor-mounted guide, as some may be more difficult to drill into than others.
-
Aesthetic Preferences: Select a guide that complements the overall style of your barn door and hardware.
-
Budget: Prices vary significantly between different types of floor guides.
By carefully considering these factors, you can choose a floor guide that ensures smooth, quiet, and reliable operation for your barn door for years to come.
Exploring different floor guide types gives you a solid foundation for selecting the best option. But before you begin installation, you need to assemble the right tools and materials. Proper preparation can be the difference between a smooth, successful project and a frustrating, time-consuming ordeal. Gathering everything beforehand ensures you can focus on the task at hand without constant interruptions.
Gathering Your Tools and Materials for Installation
Having the right tools and materials readily available before you start is paramount. It not only streamlines the installation process but also minimizes errors and ensures a professional-looking result. This section provides a comprehensive checklist to ensure you’re fully prepared before you begin installing your barn door floor guide.
Essential Tools for a Smooth Installation
A well-equipped toolkit is your best friend during any DIY project. For floor guide installation, several key tools will make the job easier and more accurate:
- Drill: A power drill is crucial for creating pilot holes and driving screws. A cordless drill offers greater flexibility and maneuverability. Choose drill bits appropriate for the type of flooring you’re working with (wood, concrete, tile).
- Screwdriver: While a drill can drive screws, a manual screwdriver is useful for fine-tuning and preventing over-tightening. Have both Phillips head and flathead screwdrivers on hand to accommodate different screw types.
- Level: Accuracy is key! A level ensures that your floor guide is perfectly aligned, preventing the barn door from binding or rubbing. A small bubble level is sufficient for this task.
- Measuring Tape: Precise measurements are essential for proper placement of the floor guide. A standard measuring tape will help you determine the correct distance from the wall and ensure the door aligns correctly.
- Pencil: Use a pencil to mark the precise location for drilling pilot holes and installing the floor guide. A carpenter’s pencil with a thicker lead is often easier to see on various surfaces.
Having these tools within easy reach will significantly improve your efficiency and accuracy during the installation process.
Materials Checklist: Ensuring You Have Everything You Need
In addition to the right tools, gathering the necessary materials is equally important. Overlooking even a small item can bring your project to a halt. Here’s a checklist of essential materials:
- Floor Guide Kit: This should include the floor guide itself, along with any mounting hardware provided by the manufacturer. Always review the contents to ensure nothing is missing.
- Screws and Anchors: The screws included in the kit may not be suitable for your specific floor type. It’s crucial to select screws and anchors that are compatible with your flooring material (e.g., wood screws for wooden floors, concrete anchors for concrete floors). Using the wrong type of screw can lead to instability or damage.
- (Optional) Wood Shims: If your floor is slightly uneven, wood shims can be used to level the floor guide and ensure proper alignment. They are thin, tapered pieces of wood that can be inserted under the floor guide to compensate for minor imperfections.
Choosing the Right Screws:
Selecting the correct screws for your floor type is crucial for a secure and lasting installation. Here’s a quick guide:
- Wood Floors: Use wood screws with a coarse thread. The length of the screw should be sufficient to penetrate deeply into the floor joists.
- Concrete Floors: Use concrete screws or masonry anchors. These screws are designed to grip into the concrete and provide a strong hold. You’ll also need a masonry drill bit to create pilot holes.
- Tile Floors: Drilling into tile can be tricky. Use diamond-tipped drill bits and proceed with caution to avoid cracking the tile. Opt for screws that are specifically designed for tile applications.
By carefully gathering your tools and materials before you begin, you’ll set yourself up for a smooth and successful barn door floor guide installation. Taking this extra time upfront will save you headaches and ensure a professional-looking result.
Exploring different floor guide types gives you a solid foundation for selecting the best option. But before you begin installation, you need to assemble the right tools and materials. Proper preparation can be the difference between a smooth, successful project and a frustrating, time-consuming ordeal. Gathering everything beforehand ensures you can focus on the task at hand without constant interruptions. Now, with your toolkit and chosen floor guide at the ready, it’s time to walk through the actual installation process, step by careful step.
Step-by-Step Guide to Installing Your Barn Door Floor Guide
Installing a barn door floor guide might seem daunting, but with a methodical approach, anyone can achieve professional results. This section breaks down the process into manageable steps, covering everything from initial preparations to the final adjustments. Following these steps diligently will ensure your barn door glides smoothly and remains secure for years to come.
Preparation: Setting the Stage for Success
Proper preparation is arguably the most crucial phase of any installation. Rushing this step often leads to errors and rework.
Patience and attention to detail are key.
First, gather all the tools and materials you’ve identified as necessary. Having everything within easy reach prevents interruptions and keeps you focused.
Next, and equally vital, is to thoroughly read the manufacturer’s instructions specific to your floor guide. Different models may have slight variations in their installation procedures, and following these guidelines precisely is paramount for optimal performance and avoiding voiding any warranties.
Finally, ensure your barn door is already properly installed and aligned. A misaligned door will only compound any issues during floor guide installation, making it difficult to achieve smooth, consistent operation. Double-check that the door hangs straight and moves freely along its track.
Taking Accurate Measurements: Precision is Paramount
Accuracy in measurement is non-negotiable when installing a floor guide. Even slight errors can lead to rubbing, binding, or an ineffective guide.
Start by measuring the exact thickness of your barn door. This measurement is critical for positioning the floor guide correctly, ensuring it provides adequate support without obstructing the door’s movement.
Next, determine the ideal placement of the floor guide on the floor. This placement will depend on the type of floor guide you’ve selected and the specific requirements of your barn door setup. Consider the door’s swing path and ensure the guide is positioned to effectively prevent unwanted movement without interfering with normal operation.
Once you’ve determined the precise location, use a pencil to clearly mark the spot where the floor guide will be installed. These markings will serve as your guide during the actual installation, minimizing the risk of errors.
Installing the Floor Guide: Securing the Foundation
With your measurements taken and the installation location marked, it’s time to secure the floor guide.
Begin by drilling pilot holes if necessary. This is particularly important for hardwood or tile floors to prevent cracking or splitting. Use a drill bit that is slightly smaller than the diameter of the screws you’ll be using.
Next, carefully secure the floor guide to the floor using the appropriate screws and anchors. The type of anchor will depend on your floor material (e.g., drywall anchors for drywall, concrete anchors for concrete). Ensure the screws are tightened securely, but avoid over-tightening, which could strip the screws or damage the floor.
Once the floor guide is installed, test the barn door’s movement. Observe how the door interacts with the guide. Does it glide smoothly? Is there any rubbing or binding?
Adjust the floor guide as needed to optimize the door’s movement. Minor adjustments at this stage can make a significant difference in the overall performance of your barn door.
Fine-Tuning and Adjustments: Achieving Optimal Performance
The final step involves fine-tuning the floor guide to ensure seamless operation.
Pay close attention to how the barn door glides along the floor guide. The movement should be smooth and effortless, without any noticeable resistance.
If you detect any rubbing or binding, carefully examine the points of contact between the door and the guide. You may need to make small adjustments to the guide’s position to eliminate these issues.
In some cases, you might need to add shims between the floor guide and the floor to achieve the perfect alignment. These shims can help compensate for uneven floors or slight imperfections in the installation.
By carefully fine-tuning the floor guide, you can ensure that your barn door operates at its best, providing years of smooth, reliable performance.
Exploring different floor guide types gives you a solid foundation for selecting the best option. But before you begin installation, you need to assemble the right tools and materials. Proper preparation can be the difference between a smooth, successful project and a frustrating, time-consuming ordeal. Gathering everything beforehand ensures you can focus on the task at hand without constant interruptions. Now, with your toolkit and chosen floor guide at the ready, it’s time to walk through the actual installation process, step by careful step.
Troubleshooting Common Floor Guide Installation Problems
Even with meticulous planning and careful execution, snags can occur during floor guide installation. Knowing how to diagnose and resolve these common issues can save you time, frustration, and potentially costly mistakes. This section addresses typical problems encountered during the installation process and provides practical solutions to get your barn door gliding smoothly.
Misalignment Mayhem
A misaligned floor guide is one of the most frequent culprits behind poor barn door performance. This can manifest as the door binding, scraping, or failing to stay on its intended path. Identifying the root cause is the first step toward a solution.
Diagnosing Misalignment
Begin by visually inspecting the floor guide in relation to the barn door. Is the guide parallel to the wall? Is it positioned correctly to catch the door as it slides? Use a level to confirm the guide is plumb. Also, ensure the door itself is hanging straight and moving freely along the track. Any inconsistencies here will highlight the source of the problem.
Corrective Actions
If the floor guide is slightly off, you might be able to loosen the screws and make minor adjustments to its position. Use a level to ensure it is now correctly aligned, and then re-tighten the screws securely.
For more significant misalignment issues, you might need to remove the floor guide completely and re-mark its intended position. Double-check your measurements before re-installing, using a measuring tape and pencil to ensure accuracy.
If the problem stems from the barn door itself not being plumb, you’ll need to address that separately. This might involve adjusting the door’s hangers or shimming the track.
Rubbing and Binding
When a barn door rubs against the floor guide, it can create unsightly scratches, generate noise, and make the door difficult to operate. This friction often results from an improperly sized or positioned floor guide.
Identifying the Source of Friction
Examine the points of contact between the door and the floor guide. Is the door too thick for the guide? Is the guide positioned too close to the door? Or is there an obstruction preventing smooth passage?
Solutions for a Smooth Glide
If the floor guide is too narrow, consider replacing it with a wider model that provides adequate clearance for the door.
If the guide is positioned too close, try adjusting its position further away from the door. You may need to drill new pilot holes for the screws.
Sometimes, the rubbing is due to debris accumulating in the floor guide channel. Thoroughly clean the guide and the bottom of the door to remove any obstructions.
Stripped Screws: A Slippery Situation
Stripped screw holes are a common headache during any installation project, including floor guides. This occurs when the screw threads no longer grip the material, leaving the screw loose and ineffective.
Prevention is Key
Before driving screws, always drill pilot holes that are slightly smaller than the screw diameter. This provides a channel for the screw and prevents it from binding and stripping the hole.
Use the correct size and type of screwdriver for the screws you are using. A driver that is too small or the wrong shape can easily slip and damage the screw head or strip the hole.
Avoid over-tightening the screws. Once they are snug, stop turning. Over-tightening is a major cause of stripped screws.
Remedial Actions
If you encounter a stripped screw hole, don’t despair. There are several ways to fix it.
One option is to use longer screws that can reach deeper into the material and find a fresh grip.
Another solution is to insert wood glue and toothpicks or small wood shims into the stripped hole. Allow the glue to dry completely, then carefully re-drill a pilot hole and drive the screw.
For more severe cases, you may need to use screw hole repair kits, which contain specialized plugs or fillers that restore the integrity of the hole.
Exploring different floor guide types gives you a solid foundation for selecting the best option. But before you begin installation, you need to assemble the right tools and materials. Proper preparation can be the difference between a smooth, successful project and a frustrating, time-consuming ordeal. Gathering everything beforehand ensures you can focus on the task at hand without constant interruptions. Now, with your toolkit and chosen floor guide at the ready, it’s time to walk through the actual installation process, step by careful step.
Maintaining Your Floor Guide for Longevity
A barn door floor guide, though seemingly a small component, plays a significant role in the overall functionality and lifespan of your barn door. To ensure it continues to perform its job flawlessly, implementing a regular maintenance routine is crucial. Neglecting this can lead to premature wear, diminished performance, and potentially even damage to your barn door and surrounding structures.
The Importance of Regular Maintenance
Think of your floor guide like any other moving part in your home – it requires attention to keep it in optimal condition. Regular maintenance prevents the buildup of debris, ensures proper alignment, and addresses minor issues before they escalate into major problems. Ultimately, a little preventative care goes a long way in saving you time, money, and frustration in the long run.
Establishing a Cleaning Routine
One of the simplest, yet most effective, maintenance tasks is regular cleaning. Over time, dust, dirt, and other debris can accumulate around the floor guide, hindering the smooth gliding action of your barn door.
To clean your floor guide effectively:
- Use a vacuum cleaner with a brush attachment to remove loose debris.
- Wipe down the floor guide with a damp cloth and mild detergent.
- For stubborn grime, use a soft brush or toothbrush to gently scrub the affected areas.
- Ensure the floor guide is completely dry after cleaning to prevent rust or corrosion, especially for metal components.
Aim to clean your floor guide at least once a month, or more frequently if you live in a dusty environment or have pets.
Performing Regular Inspections
In addition to cleaning, regular inspections are essential for identifying potential problems before they cause significant damage.
During your inspections, pay close attention to the following:
- Alignment: Ensure the floor guide remains properly aligned with the barn door. Misalignment can cause the door to bind or scrape against the guide.
- Fasteners: Check that all screws and anchors are securely tightened. Loose fasteners can compromise the stability of the floor guide.
- Wear and Tear: Look for signs of wear and tear, such as cracks, chips, or corrosion. If you notice any damage, replace the floor guide immediately.
- Smooth Operation: Test the barn door’s movement to ensure it glides smoothly without rubbing or binding.
- Debris Accumulation: Check for any buildup of dirt, dust, or other debris around the floor guide.
Make it a habit to inspect your floor guide at least every three months, or more frequently if you notice any unusual noises or resistance when operating your barn door.
Addressing Specific Issues
Depending on the type of floor guide you have, certain issues may be more common than others. Here’s how to address a few specific problems:
Loose Screws
Loose screws are a common problem, especially with floor guides that are frequently subjected to vibration from the door’s movement.
To fix loose screws:
- Try tightening the screws first.
- If the screws continue to loosen, consider using a screw that is slightly longer or wider.
- In extreme cases, you may need to replace the anchors or use wood filler to create a more secure hold.
Rust and Corrosion
Rust and corrosion can be a problem with metal floor guides, especially in humid environments.
To prevent and treat rust:
- Apply a rust-inhibiting paint or coating to the floor guide.
- Remove any existing rust with a wire brush or sandpaper.
- Clean the area thoroughly before applying the protective coating.
Misalignment
Misalignment can occur if the floor guide is bumped or if the floor settles over time.
To correct misalignment:
- Loosen the fasteners and reposition the floor guide until it is properly aligned with the barn door.
- Use a level to ensure the floor guide is plumb.
- Retighten the fasteners securely.
- Consider using shims to make fine adjustments and ensure a perfect fit.
By proactively addressing these common issues, you can extend the lifespan of your floor guide and maintain the smooth, reliable operation of your barn door.
So, that’s the lowdown on floor guides for barn doors! Hopefully, you’re feeling confident enough to tackle your next install. Happy sliding!